


Tired of Boring Worksheets? Here’s How to Make Them Interactive
Worksheets are a staple in classrooms and homes, helping kids practice essential skills. But if your learners seem bored or disengaged, it may be time to rethink your approach. Interactive worksheets are a game-changer, transforming static PDFs into engaging, hands-on activities that kids love.
What Exactly Is an Interactive Worksheet?
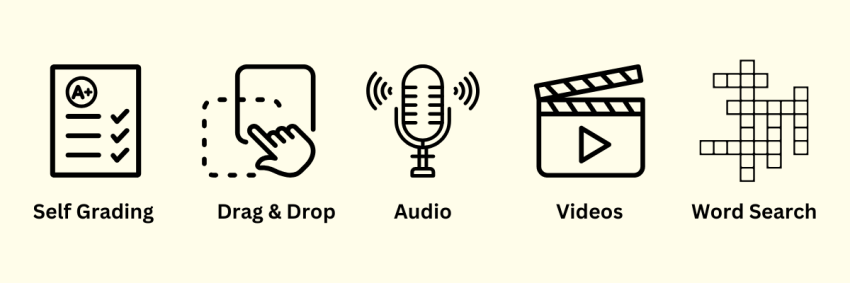
Think of interactive worksheets as digital activities that go beyond fill-in-the-blank. They’re clickable, responsive, and dynamic. Instead of printing and grading stacks of paper, you can assign a worksheet that auto-grades, offers instant feedback, and even includes videos or audio.
Here’s what sets them apart from traditional worksheets:
Interactive worksheets can:
– Automatically grade student responses
– Offer instant feedback (so students learn as they practice)
– Support various learning styles: visual, auditory, and kinesthetic
– Save time for teachers by streamlining assignment and grading
– Allow real-time learning even in remote or hybrid settings
And best of all? They’re surprisingly easy to create.
Step-by-Step: How to Make a Worksheet Interactive on LiveWorksheets.com
Creating your first interactive worksheet doesn’t require any fancy tech skills. With just a few simple steps, you can turn any printable PDF into a fully functional online activity.
Let’s walk through it:
Step 1: Sign Up and Set Up Your Teacher Account
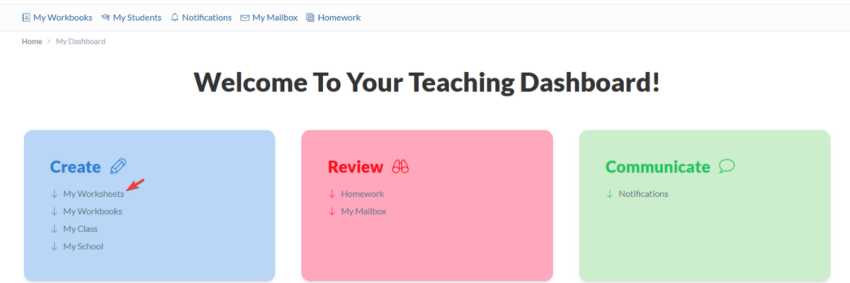
To get started, sign up for a free teacher account on LiveWorksheets. Once logged in, navigate to the My Worksheets tab.
This will be your teacher dashboard. Your central hub to create, organize, and manage all your interactive resources.
Step 2: Upload Your Worksheet Background
Click Add Worksheet and upload your background file. This can be a PDF, image, or any supported format. Your background acts like a canvas - the static content you’ll layer your interactive elements onto.
Common examples:
– A math worksheet with equations to solve – A vocabulary list to match with definitions – A science diagram with labels to drag and drop
💡 Pro tip: Save frequently used backgrounds to your Media Library so you can reuse them later without uploading again.

Step 3: Add Interactive Elements
Now the fun part begins! It's time to make your worksheet come to life.
Click Elements in the left sidebar. From here, you can drag interactive features directly onto your worksheet. Place them wherever students need to click, type, drag, or listen.
Some of the most popular interactive tools include:
Single Choice: Students choose one correct answer (ideal for multiple choice) Check Boxes: Great for questions with more than one correct response Join with Lines: Match terms or images by connecting pairs Open Answer: Allow for longer, typed responses Drag and Drop: Let students move words, numbers, or images into place Listening: Upload audio clips — perfect for language learners or auditory instruction Boost Value: Assign more points to harder questions Embed a YouTube Video: Add context or introduce a new topic visually
Embed a PowerPoint: Provide detailed explanations inside the worksheet

Step 4: Save and Preview Your Work
Once you've added all your interactive tools, click Save and View. This is your chance to test the worksheet just like your students would.
Make sure:
– Drop zones are responsive – Audio and video load correctly – Correct answers are recognized – Instructions are clear and visible
Think of this step as a quick quality check. It’s worth the extra minute.
Step 5: Share with Your Students
When everything looks good, it’s time to assign your worksheet. You can:
– Share a direct link via email, LMS, or messaging – Add it to a student’s assigned workbook if they’re using LiveWorksheets regularly – Track results and progress right from your teacher dashboard
No printing. No stacks of papers. Just click, assign, and go.
Why Teachers Love Interactive Worksheets
Still wondering if it’s worth making the switch? Here’s what educators say they love:
Instant engagement: Kids are naturally drawn to anything tech-based. Real-time feedback: Students learn from their mistakes on the spot. Time-saving: No more hours spent grading by hand. Better differentiation: Audio, video, and flexible question types help reach all learners. Remote-friendly: Perfect for hybrid or at-home instruction.
Word List Ideas to Get You Started
Creating interactive worksheets for vocabulary practice? Here's a sample of clean, scannable word lists you might use:
Themes for Younger Learners Colors: red, blue, green, yellow, orange, purple, pink Numbers: one, two, three, four, five, six, seven Animals: dog, cat, bird, fish, lion, elephant, horse Feelings: happy, sad, angry, excited, tired, scared
Themes for Upper Elementary Synonyms: big/large, fast/quick, happy/joyful, cold/chilly Antonyms: hot/cold, up/down, loud/quiet, easy/hard Science: gravity, energy, matter, solid, liquid, gas Math Terms: fraction, multiply, angle, graph, equation
Themes for ESL Practice Daily Activities: brush, eat, sleep, walk, run, write Weather: sunny, cloudy, rainy, snowy, windy, stormy Classroom Items: pencil, eraser, ruler, book, desk, chair
You can easily plug these into your worksheet backgrounds and pair them with interactive tools like drag-and-drop or audio playback.
Start Simple and Grow From There
You don’t have to convert your entire curriculum overnight. Start with just one worksheet. Choose one your students are already familiar with, then add a few interactive touches and see how they respond.
Chances are, you’ll be surprised how much more engaged they are and how much easier your life becomes in the process.
Explore More Worksheets
Looking for inspiration? Browse our collection of pre-made interactive worksheets on LiveWorksheets.com. Whether you're teaching math facts, phonics, science vocabulary, or geography, there's something ready to go.
Take a look, try one out, and see how easy it is to make learning more hands-on. Your students (and your future self) will thank you.